Setting Up Invoice-by-Project Time
Use this when a client wants a contractor to log time against specific project line items each week, and wants those projects to appear as separate line items on the invoice.
Prerequisites
- Client Projects feature must be enabled on the account’s plan. It’s plan-gated. If the Add button on the Projects page is greyed out, the plan either doesn’t include Client Projects or is at its limit — enable/raise it before continuing.
- You need the exact project names from the client and to know which contract job(s) each project attaches to.
Step 1 — Create the project list on the client
Billing → Projects (Client Projects)

- Search for and select the client.
- Add each project by name (optionally set a start date, and an end date if the project is time-boxed).
- Associate each project to the relevant contract job(s) — this is what makes the projects appear as options on that contractor’s timesheet.
Tip: include a catch-all like “Non-Project Related” if the contractor logs hours (travel, admin, expenses) that don’t map to a specific project.
Step 2 — Switch the invoice template to bill by project (Still in Beta)
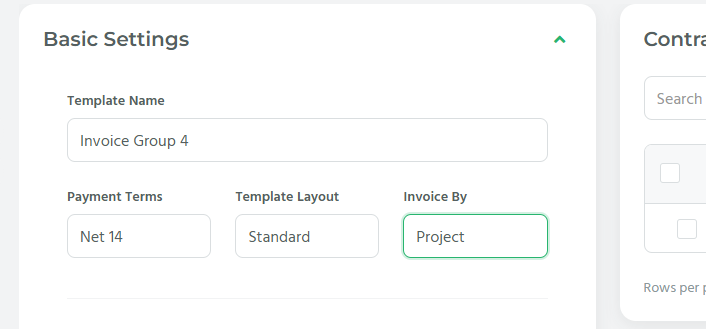
On the client’s Invoice Groups → Basic Settings
- Set the “Invoice By” dropdown to Project.
This is the switch that splits the invoice into one line item per project instead of a single lump line for the job. (Other options here are Contract Job, Purchase Order, or Custom Field — Project is the one for this use case.)
Step 3 — Contractor enters time by project each week
Once Steps 1–2 are done, on the contractor’s weekly timesheet they:
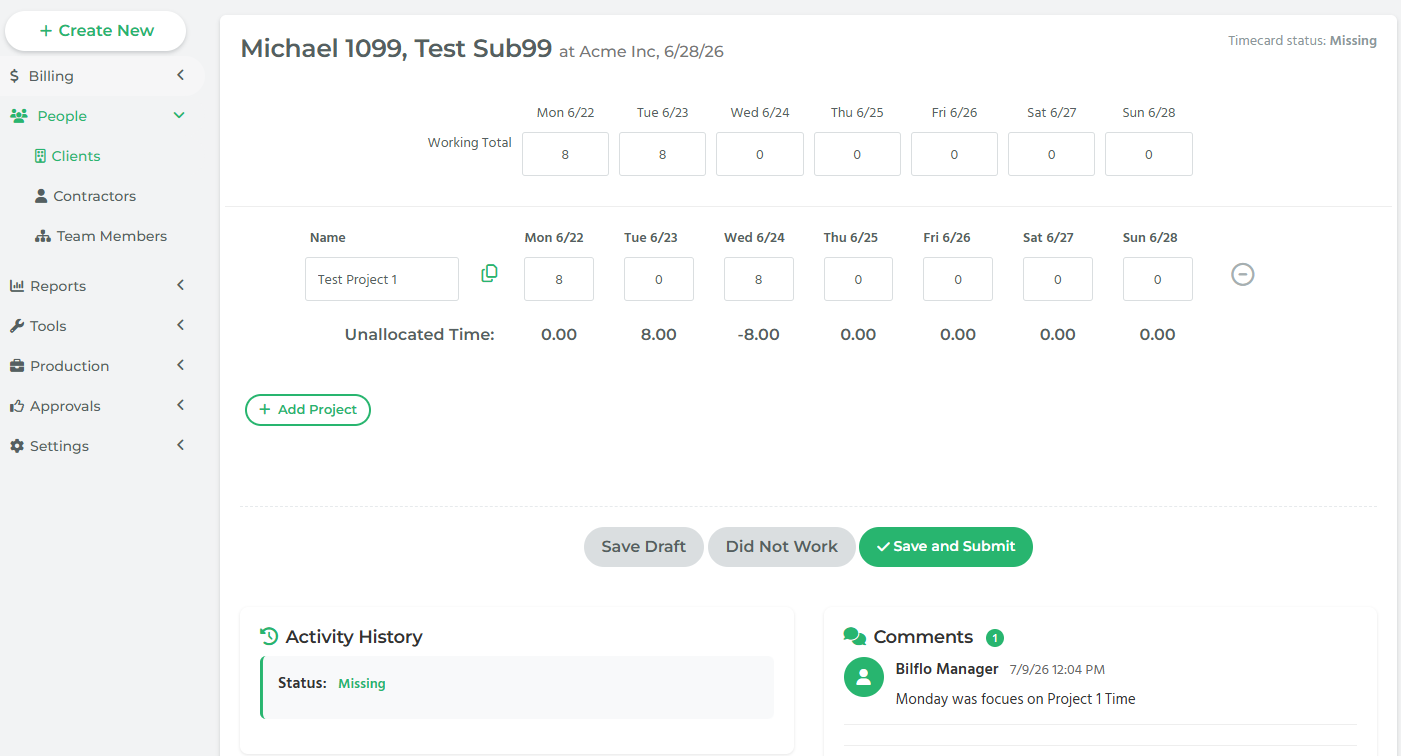
- Add a Project row.
- Pick the project name from the associated list.
- Enter hours per day against that project.
- Repeat for as many projects as they split time across in the week.
Those per-project allocations flow straight through to the generated invoice as separate line items.
What you owe the client vs. what they owe you
- Client provides: exact project names, and which job/contractor they attach to.
- You configure: confirm the plan feature is on, create the projects + associations (Step 1), flip the invoice template to “Invoice By: Project” (Step 2).
- Contractor does: just picks the project and logs hours each week — no extra setup required from them.
Quick pre-check before going live
- Confirm the account’s plan has Client Projects enabled.
- Confirm the contract job(s) the projects should attach to.
- Decide whether a catch-all project (“Non-Project Related”) is needed for non-project hours/expenses.